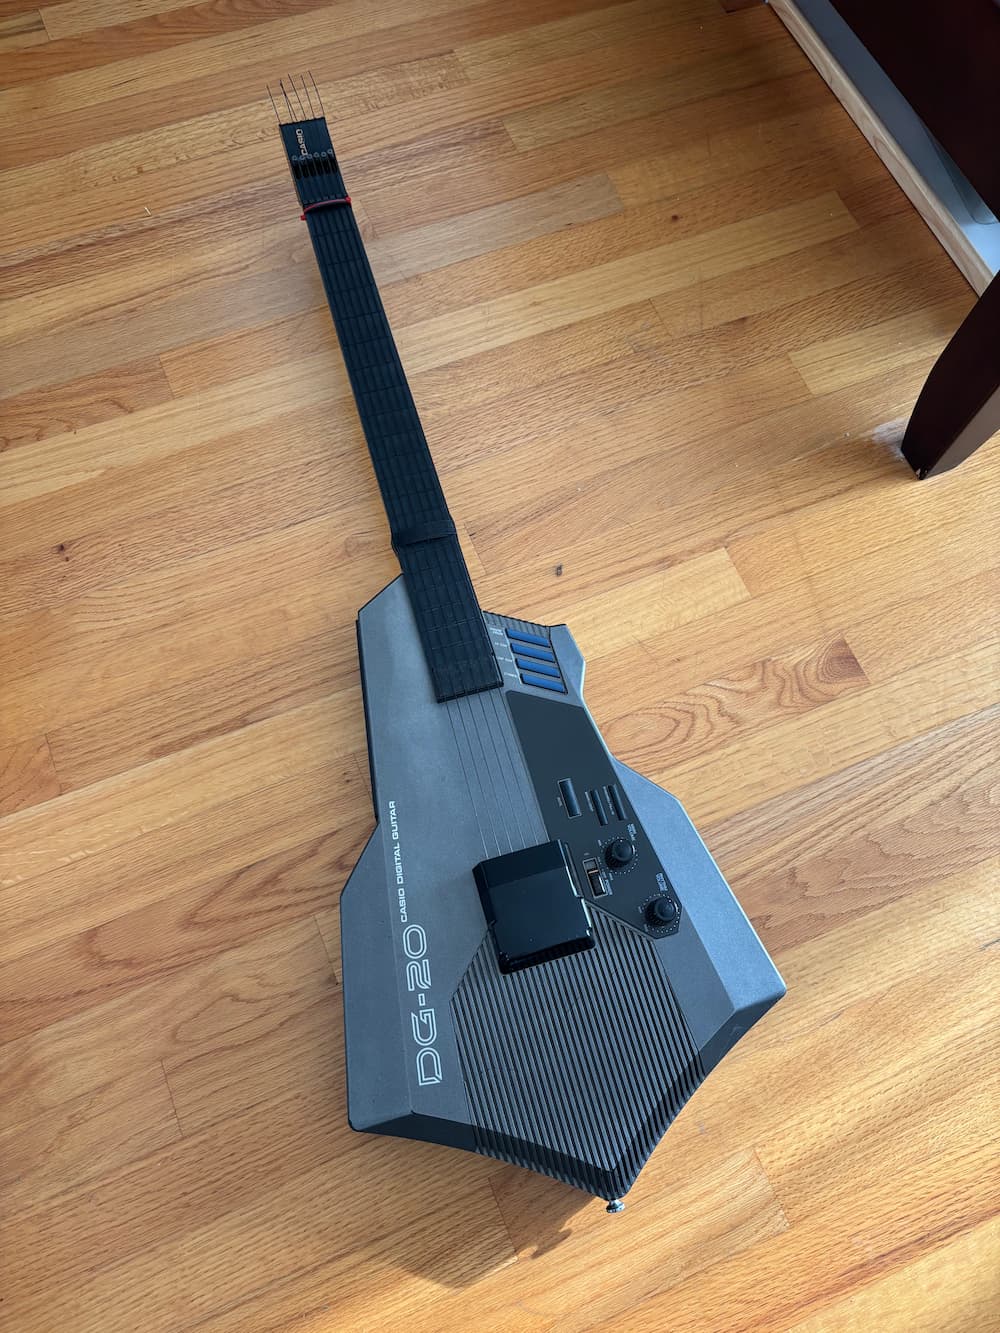
DIY Upgrades for the Casio DG-20 Synth Guitar

For some reason I have been very interested in synth and MIDI guitars lately.

That may have to do with the fact that I’m actually building one! The MIDISteel … but that’s another post.

The grandaddy of synth guitars is the Casio DG-20 which came out in 1987. And while indulging in my bad habit of browsing FB marketplace, I scored one. The owner lived a couple of blocks away, so… I had to, I guess?

It features 20 built-in presets ranging from classic 80s synths, brass, and organs to traditional acoustic instruments. It has a drum machine built in, and a hilarious set of drum trigger pads that are basically impossible to use while playing. It also features a 5-pin MIDI out so the possibilities really explode when you hook it up to other synths or a computer. This is great because the built-in sounds are just kind of… OK. That’s being generous.
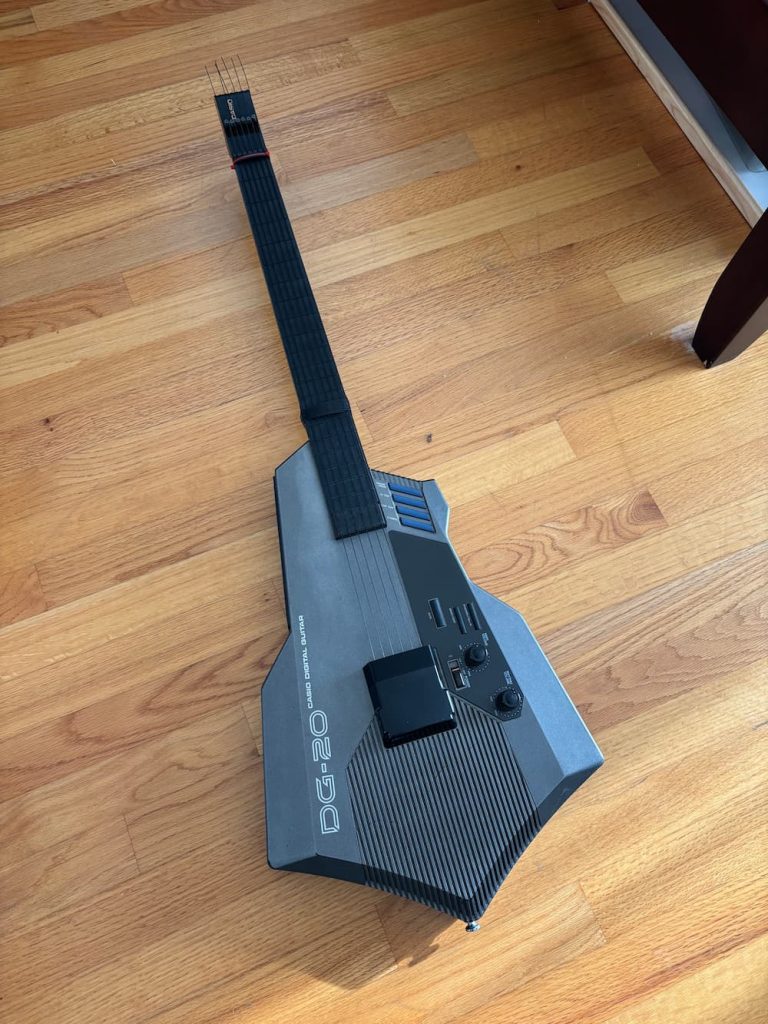
Eat cyber-axe, unsuspecting audience

Hardware wise, this thing is bulky, clunky, and pointy. It is clumsy at tracking softer string plucks. It has floppy nylon strings that are a pain in the ass to tighten (requires a not-included hex wrench). It runs on thick D-Cell batteries. It doesn’t really like being hung by its headstock or even sitting comfortably on a guitar stand. In short: it’s a hostile assault on the guitar as you know it. But… I kind of love it anyway?

Well maybe not as much as I love my Suzuki Unisynth (yes, I also own this, I have problems). The Unisynth is way simpler, lighter and whose more primitive onboard synth is much more pleasing to my 8-bit era ears. It’s also pretty not-guitar-ish, but at least it feels less serious about what its trying to be.
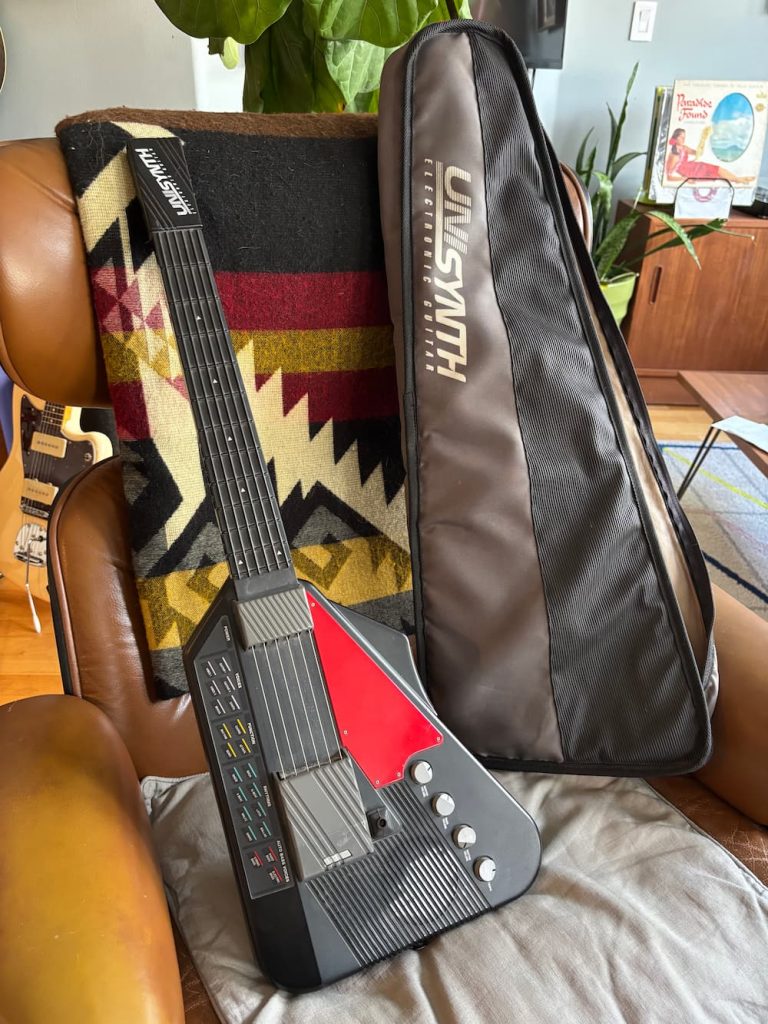
The Suzuku Unisynth XG-1, a delightful thing, in comparison. Maybe I should start a digi-guitar museum

But I digress, we’re here to talk about the DG-20! That Flight of the Conchords-famous, mean hunk of grey plastic sure to make any ’80s 15-year-old scream “radical, dude!”. And there’s a few things it does well over the XG-1: it can do hammer-ons and pull offs. MIDI. More frets. I guess you could argue that it feels more like a guitar, too.

Missing string cover

Almost all of the DG-20s I’ve seen for sale are missing this piece that covers part of the bridge. As far as I can tell its purely cosmetic, but the completionism in me wanted to restore it all the same.

I didn’t have one in front of me to inspect, but eyeballing some pictures online, I modeled one up in CAD and 3D printed a replacement part. Amazingly I nailed the curvature on first try. However, it took a couple of tries to get the mounting tab fit right.

You can download my model on Printables
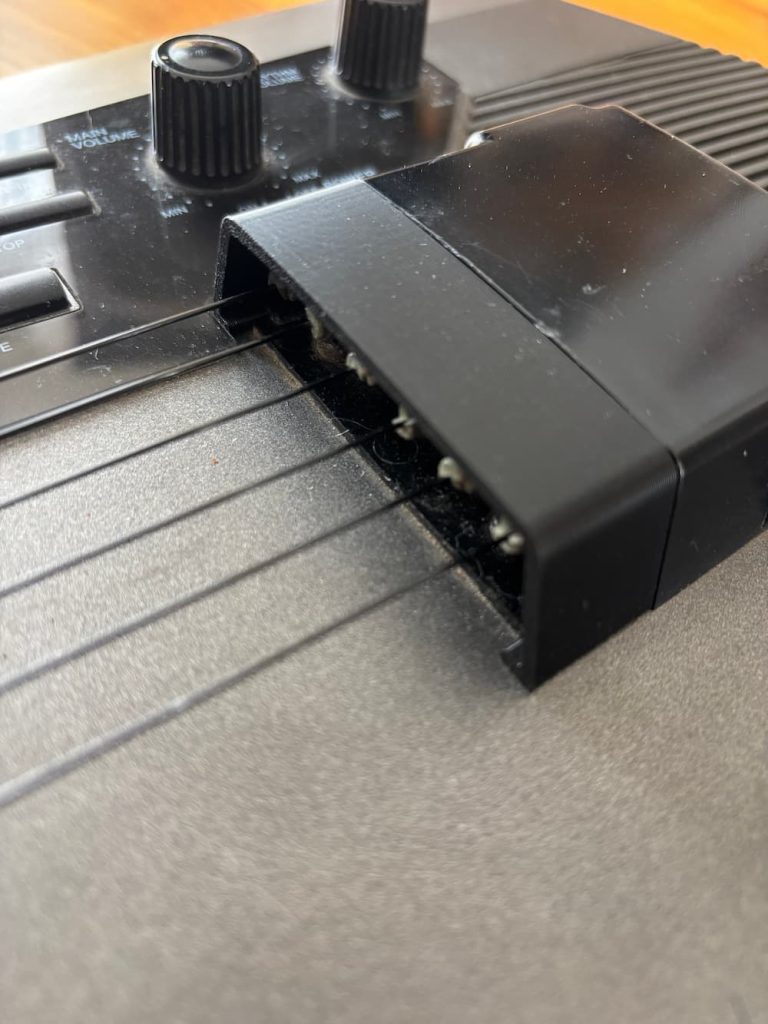
Replacement string cover for DG-20

Of course, shortly after making it I saw another one created by @GoldELux_544357 (Printables’ search missed it for some reason). That one was more complete and includes the larger part if you’re missing it. For this and more DG-20 related parts, head to their profile.

Ready for some action (adjustment)

The next matter with the DG-20 was the action was insanely high. Like Freddie Green high. Even with the looser strings, it was not at all enjoyable to play. Turns out over a few a decades, a long narrow piece of plastic under 6-strings worth of tension is prone to warping. Who knew? Not Casio.

I puzzled over how to address this. Could I install a truss rod? I took it apart to see. No, not easily. The neck is basically a hollowed out tube with no direct access to the back of it so I’d have to take apart the fretboard to get in there which seems fragile. I guess I could chance getting laughed at by taking it to a luthier at Gryphon Strings for a “neck reset”. But the fitted bolting mechanism of the neck made this difficult without some serious hacking away at the plastic.

Some online forums suggested simply taping down the strings where the neck meets the body to lower them. This works because the pluck sensor doesn’t really use the string length to determine the pitch. The fretboard is really just individual buttons under the rubber fretboard and the strings there are really just for tactile feedback.

Anyway, I found taping the strings to be a little inconsistent and sloppy, but finally landed on one of those velcro cable ties. Works great and is easier to adjust. Also, the material allows the strings to slide around underneath without getting stuck. I added a couple of extra pieces in the middle to give some added pressure down on the middle strings to account for the bowed curvature of the strip when attached.
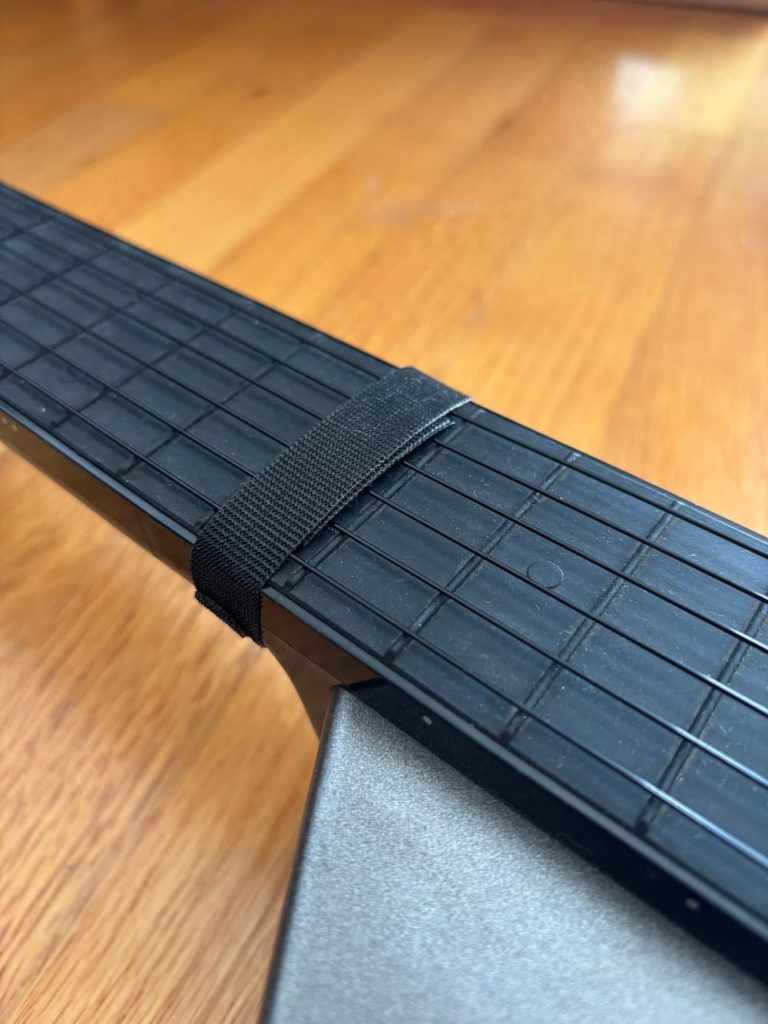
Velcro cable tie strip around the 15th fret to lower the action.

I can actually still fret the 15th-fret note by pressing on the velcro which is kinda clunky, but I don’t play up there very often.

I still found the action to be unpleasant and thought that the action at the nut was also inherently too high. While watching a video of Billy Strings absolutely ripping on one of these guitars… oh let’s just see that while we’re at it:

He seems to have a zip tie around the nut to lower it some more. I added that myself, and 3D-printed a little piece to go under the zip tie to apply even pressure.
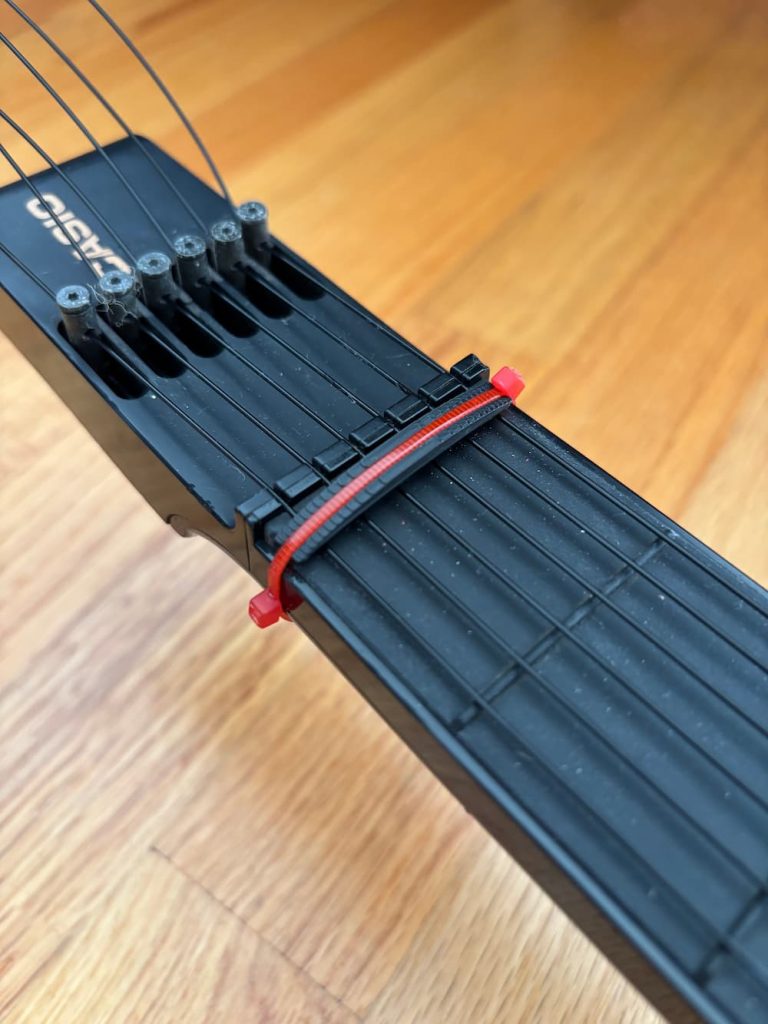
Ziptie with 3d-printed block to lower strings even more at the nut.

That solved the action issue, more or less. Much more playable overall. The model is also available on Printables, and requires a couple of 2.75mm zip ties to install. You can probably rig up something similar, maybe the velcro works here too.

By the way, the Suzuki Unisynth gets around this nonsense by not having strings over the fretboard at all, and including horizontal string-like texture on the rubber fretboard itself, I think it’s superior to these floppy things. Maybe another improvement could be to somehow add this texture to the original fretboard, and forgo the strings altogether. But you’d need to figure out how to keep strings over the body for the pluck sensor.

Oh, what the hell: USB-C charging

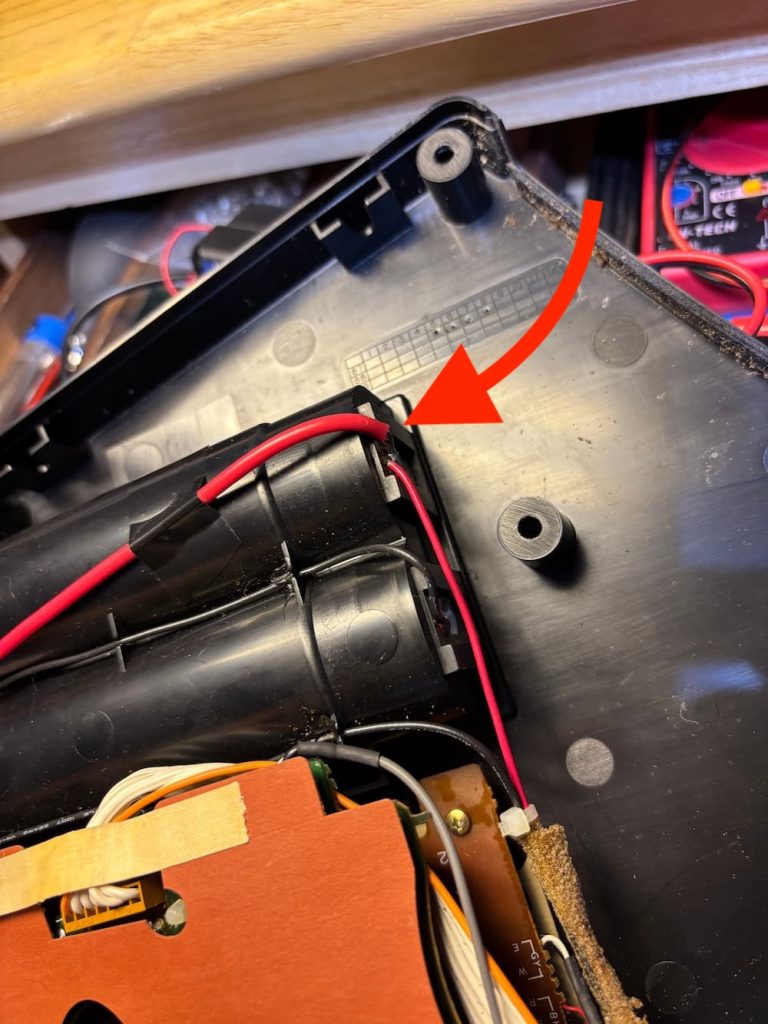
These guitars are really no fun to play if you have to plug them in, but D-Cell batteries are heavy, expensive, and less-common in rechargeable variants. They also discharge and leak horrible acid when left in too long.

I thought I’d take advantage of modern LiPo battery tech. There was plenty of space in the battery cavity for a couple of ubiquitous 18650 LiPo cells. All I had to do was connect a charging + boost module to them and step them up to the operating voltage of 9V. I happened to have these components from another abandoned project; I have no shortage of those.

The module is based on the TP4056 chip and has a built-in buck converter to step up the battery voltage to an adjustable amount up to 28V. It’s available here very cheaply along with some handy 18650 battery housings: https://amzn.to/4xYoo9w (affiliate link). For the cells, I got these: https://amzn.to/44JW0KF
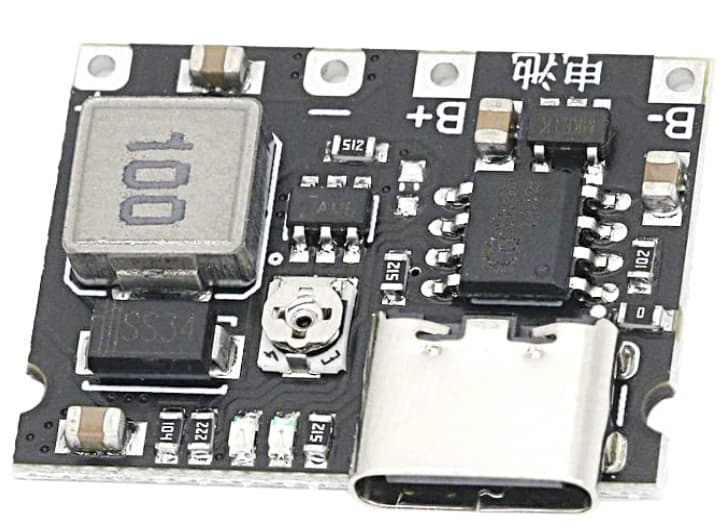
Looks intimidating, but it’s pretty simple to wire up. While it’s possible to do this with one 18650 cell, I’m wiring the two cells in parallel for extra capacity, so both the red wires of the battery housings go into B+, and the black ones go to B-.

Once you have the batteries attached, charge them up via USB. The LED will start red, and turn blue once they are done. This can take a few hours. Then you can wrap the batteries together into a pack with electrical tape or hot glue. Note that you shoud NOT COVER THE CHARGE BOARD WITH TAPE. It gets hot needs ventilation for cooling.

While it’s charging, let’s adjust the voltage. Attach a multimeter to the unsoldered V- and V+ terminals. This is our output voltage. Measure the voltage coming out of the board and adjust the small screw in the middle of the board counter-clockwise until it reads about 9V. You may have to turn it over 10 times.

For attaching the board’s remaining V+ and V- output to the device, I opted to make the battery detachable, so I wired a male barrel connector. Red cables always go to + and black to -. I soldered the female connector to the negative and positive terminals of the battery compartment, which were also color-coded.
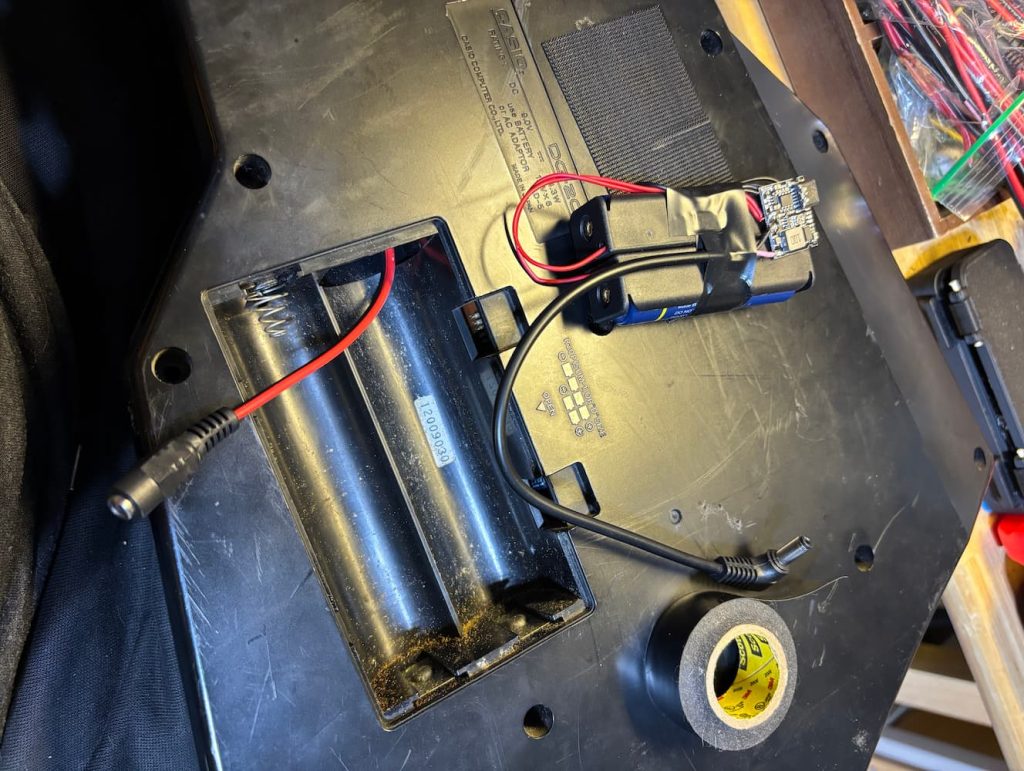
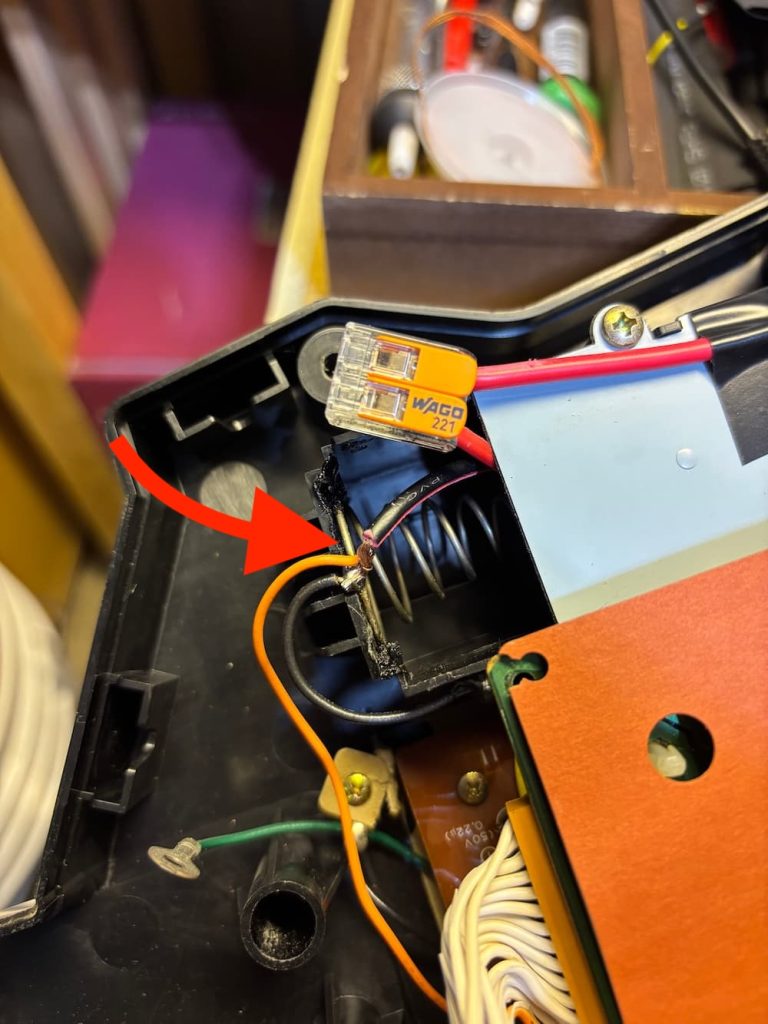
Barrel connectors soldered internally to the positive and negative leads of the battery compartment and to to the battery charging module.

With the wiring done, I put the whole thing back together, and the battery just fits inside. I shielded the DG-20’s old battery contacts with electrical tape to prevent shorts.
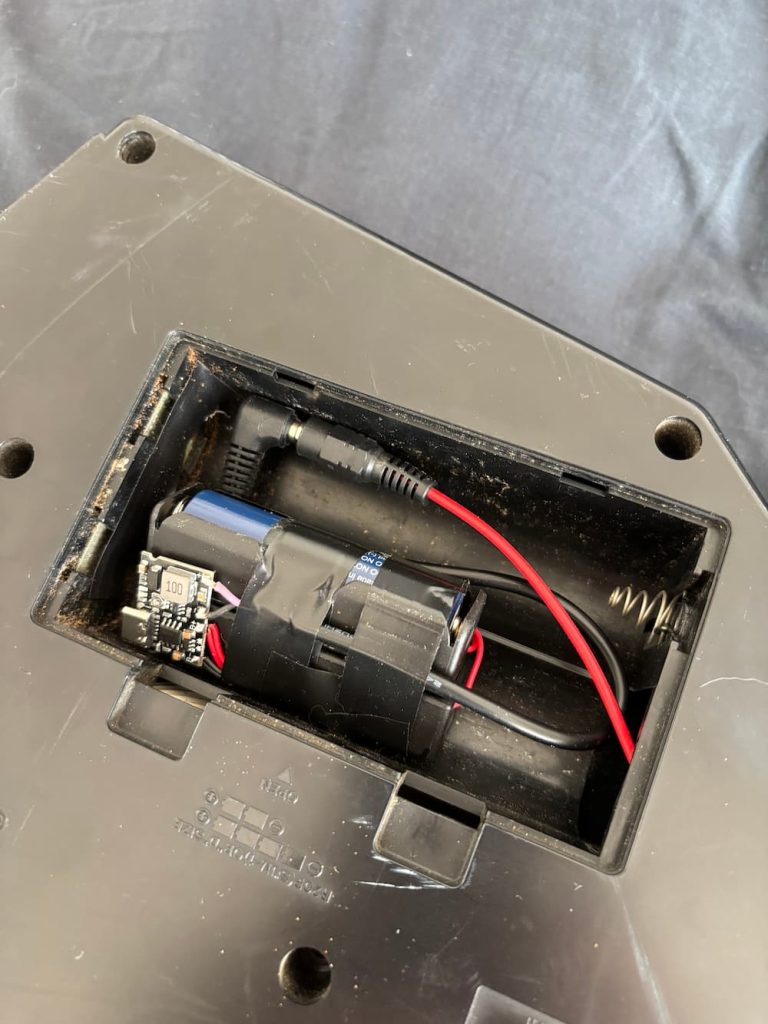
The cool thing is you can use this technique to power any kind of older battery-operated device, so I went ahead and did it to the Unisynth as well.

Not as much space in Unisynth’s C-cell sized battery compartment, so I did not bother to make the battery detachable; I just wired it directly. One hiccup is that I had to add a 10-ohm 5W current-limiting resistor in series with the battery negative to the device, since I discovered the initial current surge triggers the module’s protection circuit (if you encounter this, easy fix: plugging it into USB resets the protection). The additional resistor solved that issue.
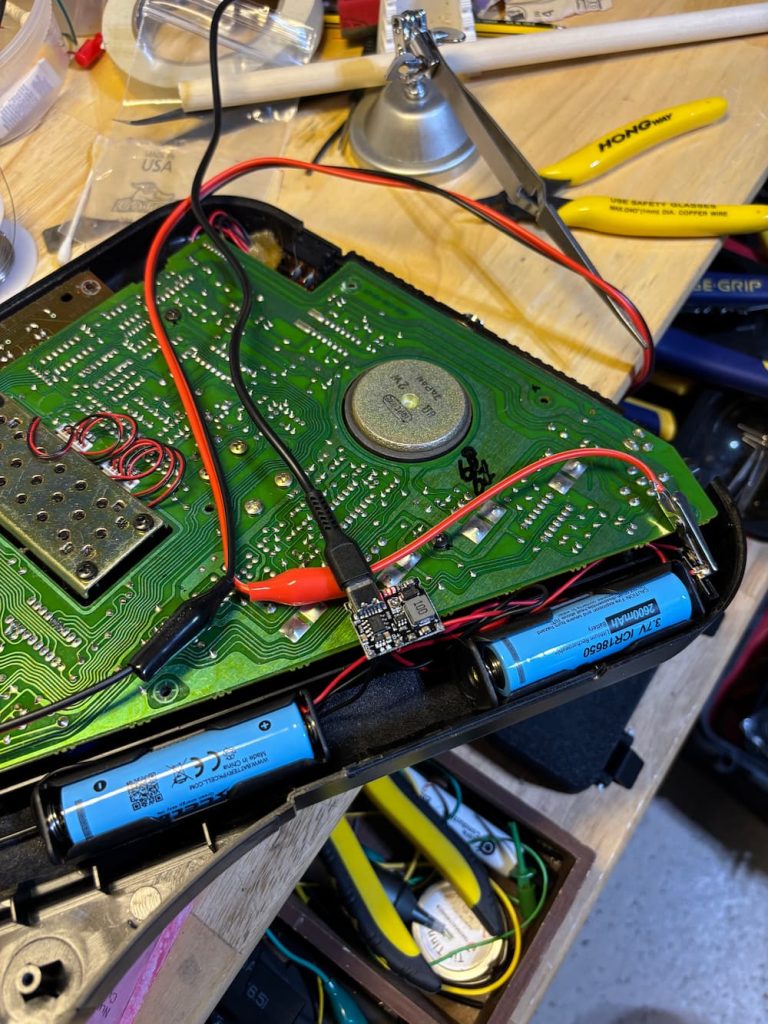
USB-C charging installed to the Suzuki Unisynth. The port is accessible externally through the battery door.

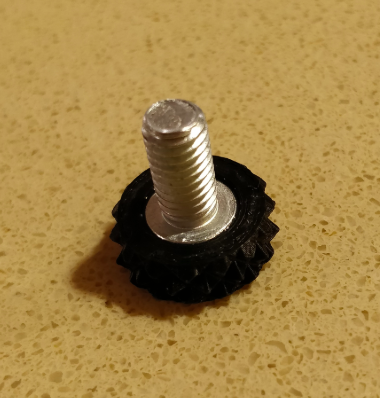
Converting machine screws to thumbscrews

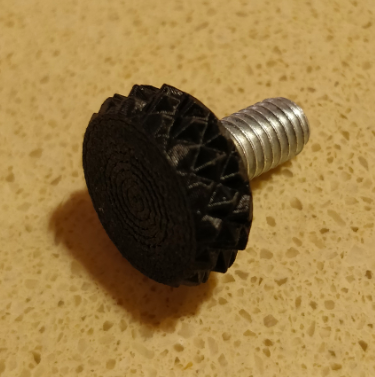
Thumbscrews are useful for things you want to take apart/adjust by hand, such as guitar pedals, cases, clamps, and microphone stands.

I often find myself wanting a thumbscrew for something that didn’t come with them, but I’m too impatient to order one or visit the hardware store, especially when I have a bunch of perfectly-good matching machine screws around the house. So why not make them?

Continue reading “Converting machine screws to thumbscrews”

Archtop tailpiece mount for 1/4″ output jacks

Ugh, drilling holes in old acoustic archtops, right?

Unfortunately, for adding an output jack there are not a lot of good solutions. In the past, I have super-glued them under pickguards, which works fine for the casual cross-legged sit-‘n’-play but it isn’t the most stable thing when you’re standing. So what can be done?

Continue reading “Archtop tailpiece mount for 1/4″ output jacks”

Fender 1000 Pedal Steel Pickup Covers

A quickie!

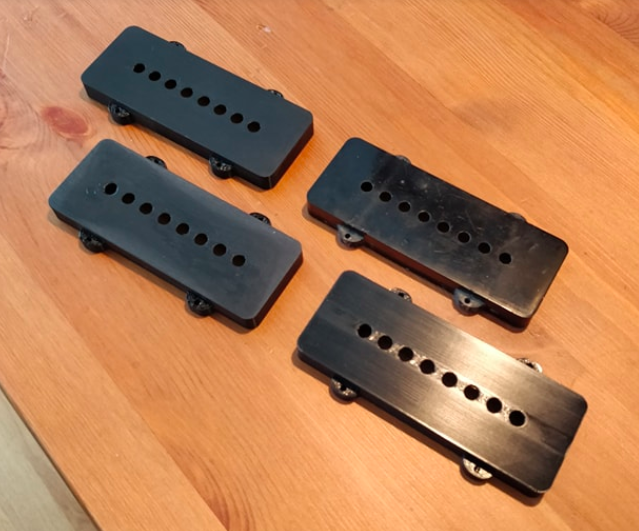
Lee Jeffriess spread the word that I might be the guy to reproduce obscure pickup covers, and sure enough I got a request for a new one, this time for the Fender 1000 Pedal Steel.

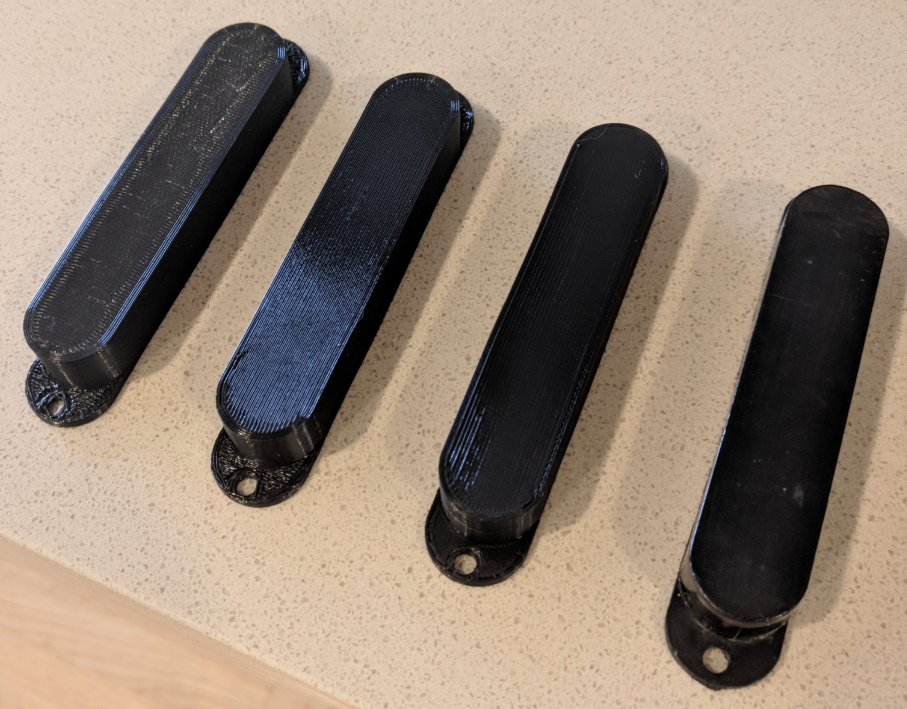
These guitars have “jazzmaster” style pickups in the 8-string format. The client reported they were a perfect fit and after some polishing using a plastic buffing compound they might be able to fool Leo himself. The above shows 3 covers with the original. Not telling which is which 🙂

If you need one for your reproduction project, I put them up on Shapeways who can fulfill the printing and shipping of them: https://www.shapeways.com/product/TMX8J22N4/fender-1000-pedal-steel-guitar-pickup-cover

Get in touch if you need anything else specific regarding these!

Project: Quilter-powered ’40s “Ampro” speaker cabinet

Remind me to go on walks more often. I was passing by one of my favorite ephemera shops Stuff Modern and remembered they have a real convenient (and well decorated!) bathroom upstairs that I needed to use.

So I popped in, and stumbled upon this:

O… M… G….

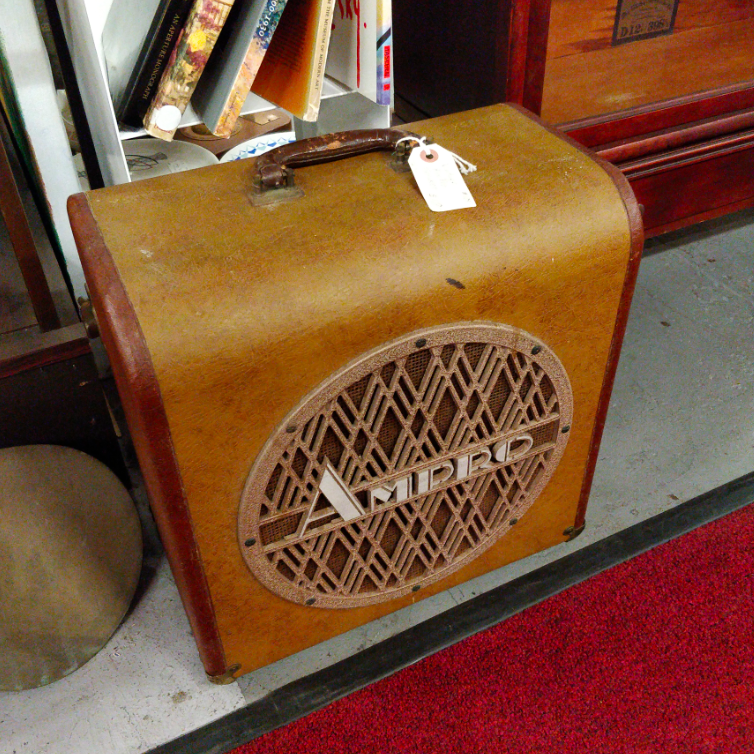
It’s an Ampro 12″ speaker cabinet with a glorious art deco metal faceplate. The grill cloth behind the faceplate is unscarred. The back of the cabinet is removable and latched on like a sewing machine case. The handle is spring-loaded and automatically stows itself down when not in use. It was $119 and looked as “like-new” as anything from the ’40s possibly can.

Continue reading “Project: Quilter-powered ’40s “Ampro” speaker cabinet”

Ultra-compact iPad music stand

Thankfully, the days of carrying around a gigantic binder full of your set list charts is over. Like many gigging musicians these days, I use an older iPad running iReal Pro for reading basic chord charts. (I know, I know, purists might take issue with this idea. If you are one of them, can skip this post and continue shaking your fist in another direction.)

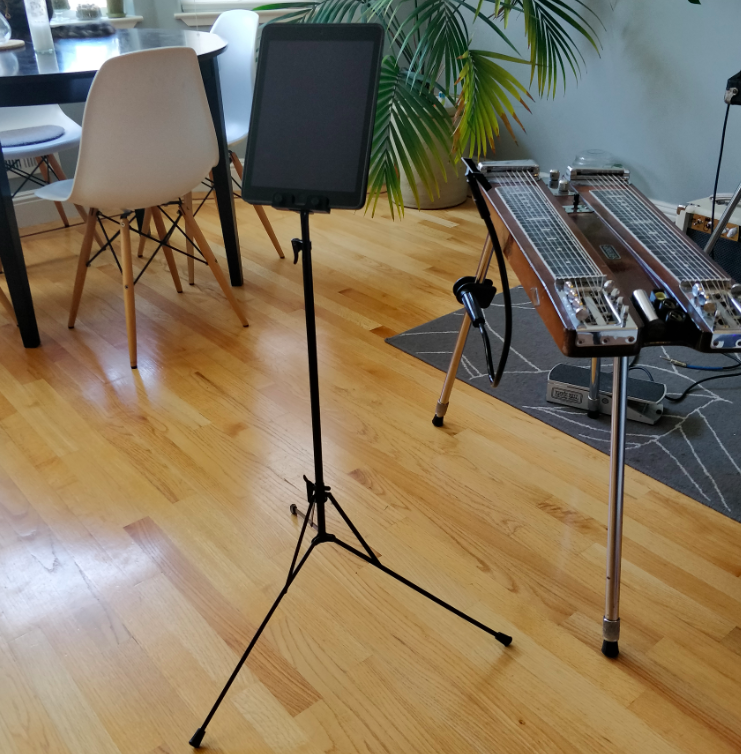
I find that full-size music stands are a bit “loud” on stage when all you’re looking at is a 10″ x 7″ rectangle. Plus, as you all probably know by now, minimalism: it’s my thing. We’re still a ways off from reading music charts off of cloud-connected ocular implants, so I came up with this guy:

Minimalist iPad music stand. Nosy readers might also see another custom gooseneck-mount phone stand on that Fender Dual Pro, but that is another post!

The stand base is the ubiquitous Hamilton two-section folding stand, a classic of jr. high school band rooms. Notice that (perhaps intentionally) “music” does not precede the word “stand” in the product listing. Their flimsy top sections weren’t the best at holding up actual sheet music. Memories of overstuffed binders somersaulting off of them are now flooding back.

Continue reading “Ultra-compact iPad music stand”

Project: Stringmaster T8 Pickup Cover Reproduction

Quick link: If you need some of these pickup covers for your project, you can grab these from my store here.

When I first met Lee Jeffriess, he was playing bass in a Hawaiian swing band that I perform with called the Alcatraz Islanders. What I didn’t know at the time is that he was a steel guitar legend and a former member of the fantastic Big Sandy and the Fly-Rite Boys during some of their best years.

Go ahead and put this on while you’re reading this, why don’t you?

As I got into steel guitar playing myself and combed through the Steel Guitar Forum for tips on this unforgiving instrument, it soon became clear that not only was Lee a monster player, he was the authority on all things vintage steel. That included history, technique, gear, recordings, and other minutiae like tone capacitor values. Many informative threads ended with something to the effect of, “That’s what I think anyway, but Lee Jeffriess would know for sure.”

So when Mr. Jeffriess, knowing I’ve been getting into this 3D design thing, asked if I could make a pickup cover for Fender Stringmaster T8 pickups, I knew that there was absolutely no other way to get them. A quick googling pointed me to aforementioned Steel Guitar Forums, which confirmed this. Ironically, you can still get modern reproductions the pickups themselves… just not the covers!

Continue reading “Project: Stringmaster T8 Pickup Cover Reproduction”

Update: Audio Technica Adjustible Bridge Mount

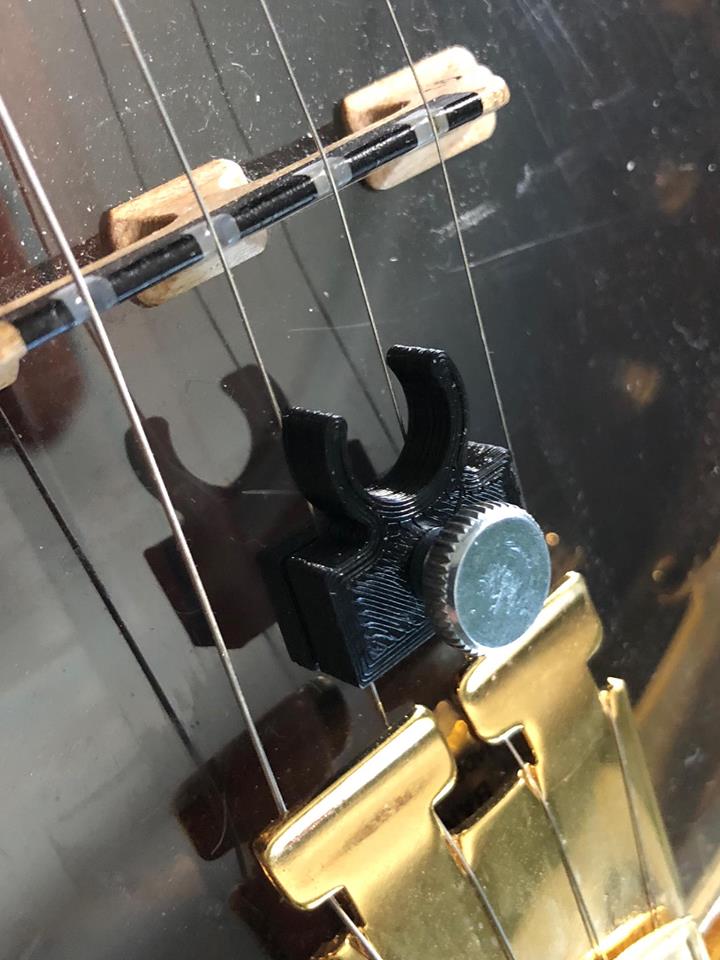
A banjo-playing colleague came across one of my AT bridge mounts and liked it, but found that the fit was quite loose on thin-string gauges, which are common on banjos.  We went back and forth a bit trying to adjust the clearance gap, but at such tight tolerances, results were mixed.

It then occurred to me to make a more universal adjustable model. I had some M3 threaded inserts left over from a previous project so I simply separated the halves of the string clamp sections and made it so they attach to each other and tighten down with a thumbscrew. Now any gauge of string should work, including bass strings if you’re feeling lucky!

So screwed
So screwed

Available at my store.

Project: DPA-Style Gooseneck Mount for Audio Technica Instrument Microphones

replicator

Update! I no longer sell these, sorry 4/29/2020

First, a digression: one of the first things you notice while getting into 3D printing is that it is far from the magic “replicator” of Star Trek, capable of spitting out molecularly-correct cups-of-joe every time. It takes a lot of research, tweaking, and stalking nerdy fellows on YouTube to figure out how to get acceptable quality prints, and even then your stuff will look pretty rough. It’s the nature of the medium… this machine is essentially a hot-glue gun on motors.

As such, I roll my eyes a bit at people who use their 3D printer primarily for making infantile decorative figurines or props. Do you really want to use up all that material, time, electricity, and post-processing hours to produce more useless plastic crap around your house? If this is the trend, future civilizations will no doubt stare in complete bewilderment at landfills full of multi-colored Baby Groots long after we’re gone.

Aww, I know, that’s mean.

Good for you if that’s your bag, but I keep my designs functional and fully understand this stuff is not “production-ready”. They just can’t have the polish necessary to survive the scrutiny of an Amazon review. So 3D printing, to me, is good for small-run niche problem-solving where looks don’t matter.

Once in a while, though, I cook up some design and when I’ve put it all together, I’m surprised that it actually looks good and is functional beyond my expectations.

Lookin' good!
Lookin’ good!

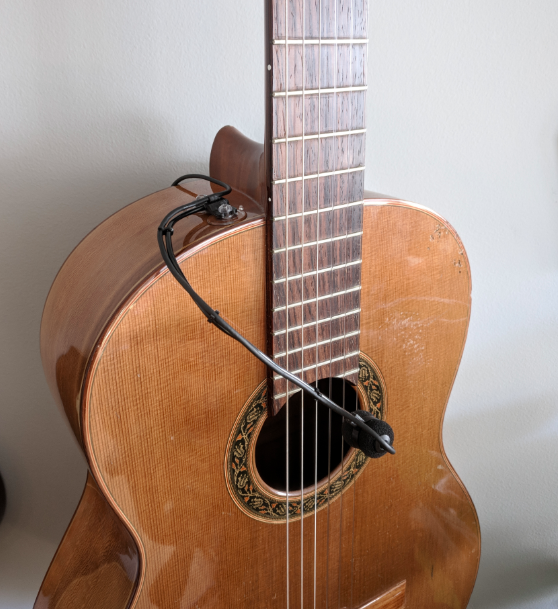
In this case, it was yet another mounting project for Audio Technica instrument microphones, which I use a lot for acoustic guitar (specifically, the Pro 70 or 831b lavalier models). I found myself wanting something that would point the mic to a sound hole or neck position with a gooseneck arm, “DPA-style“. I’ve heard some bad things about the clamping mechanisms on the DPA mounting hardware, so I thought about other ways to attach to a guitar. Why not suction cups? It worked for Nerf!

Continue reading “Project: DPA-Style Gooseneck Mount for Audio Technica Instrument Microphones”

Project: Amp Tilt-back Stand

front

Update: These are on sale now at my store!

Video demo:

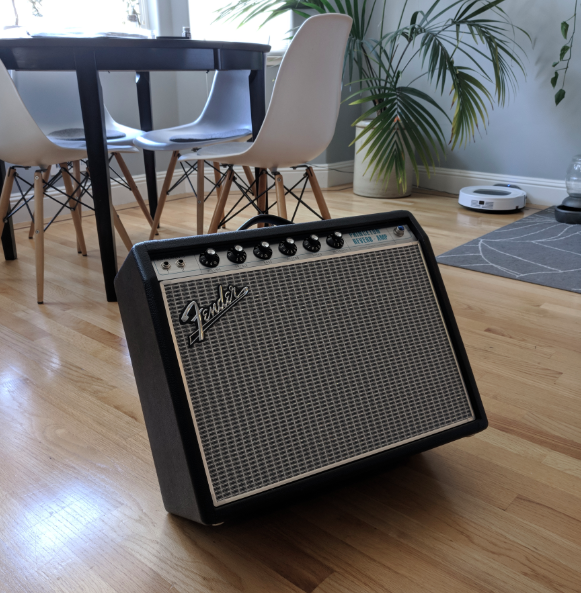
Being a working musician, city-slicker, and general disliker of ridiculously loud music, big heavy amps are not my thing. While it would be a great honor to someday be featured on the venerable Rigs of Dad, for now I’ll save my back. My chosen tube amp to date is the classic 10″ Fender Princeton Reverb. Light enough to carry with one arm, and enough power to get me to the Tone-Zone®.

However, one problem I have with smaller combo amps is that they can be difficult to hear in live situations. Amps placed on the floor simply aren’t pointing in the right direction to be heard by someone standing on stage. Sometimes I’ll hike my amp up on a chair, but that also takes up a lot of space and is unsightly. What I need is some tilt-back assembly, which would allow an amp to point upward at an angle.

Continue reading “Project: Amp Tilt-back Stand”