For some reason I have been very interested in synth and MIDI guitars lately.
That may have to do with the fact that I’m actually building one! The MIDISteel … but that’s another post.
The grandaddy of synth guitars is the Casio DG-20 which came out in 1987. And while indulging in my bad habit of browsing FB marketplace, I scored one. The owner lived a couple of blocks away, so… I had to, I guess?
It features 20 built-in presets ranging from classic 80s synths, brass, and organs to traditional acoustic instruments. It has a drum machine built in, and a hilarious set of drum trigger pads that are basically impossible to use while playing. It also features a 5-pin MIDI out so the possibilities really explode when you hook it up to other synths or a computer. This is great because the built-in sounds are just kind of… OK. That’s being generous.
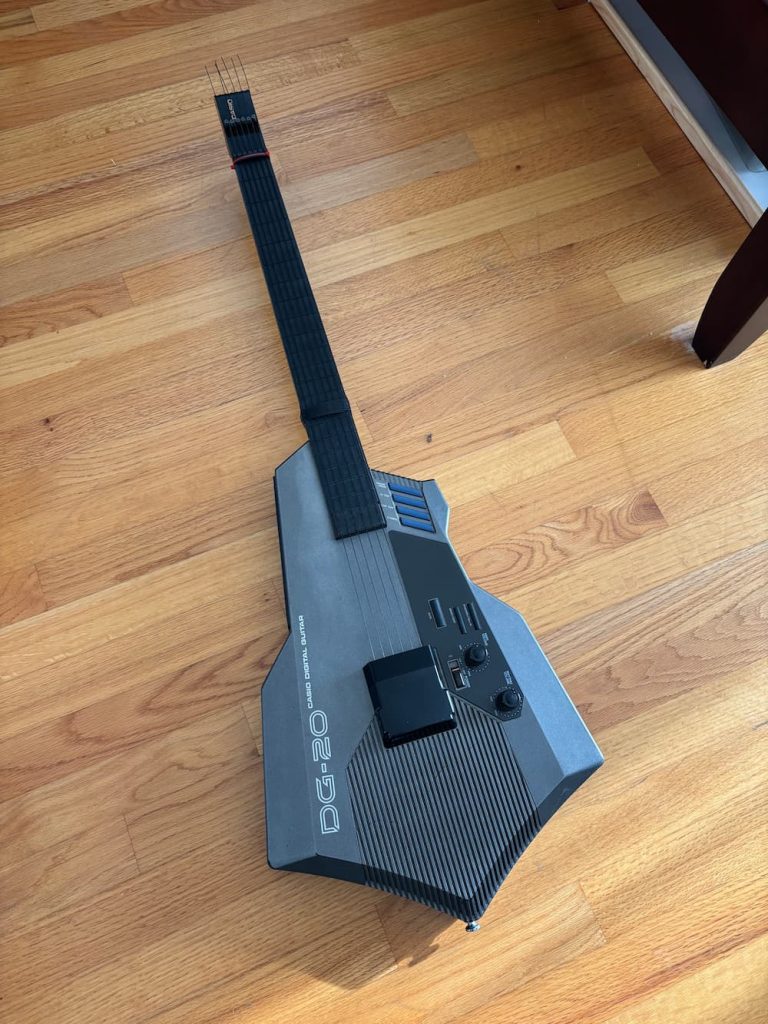
Hardware wise, this thing is bulky, clunky, and pointy. It is clumsy at tracking softer string plucks. It has floppy nylon strings that are a pain in the ass to tighten (requires a not-included hex wrench). It runs on thick D-Cell batteries. It doesn’t really like being hung by its headstock or even sitting comfortably on a guitar stand. In short: it’s a hostile assault on the guitar as you know it. But… I kind of love it anyway?
Well maybe not as much as I love my Suzuki Unisynth (yes, I also own this, I have problems). The Unisynth is way simpler, lighter and whose more primitive onboard synth is much more pleasing to my 8-bit era ears. It’s also pretty not-guitar-ish, but at least it feels less serious about what its trying to be.

But I digress, we’re here to talk about the DG-20! That Flight of the Conchords-famous, mean hunk of grey plastic sure to make any ’80s 15-year-old scream “radical, dude!”. And there’s a few things it does well over the XG-1: it can do hammer-ons and pull offs. MIDI. More frets. I guess you could argue that it feels more like a guitar, too.
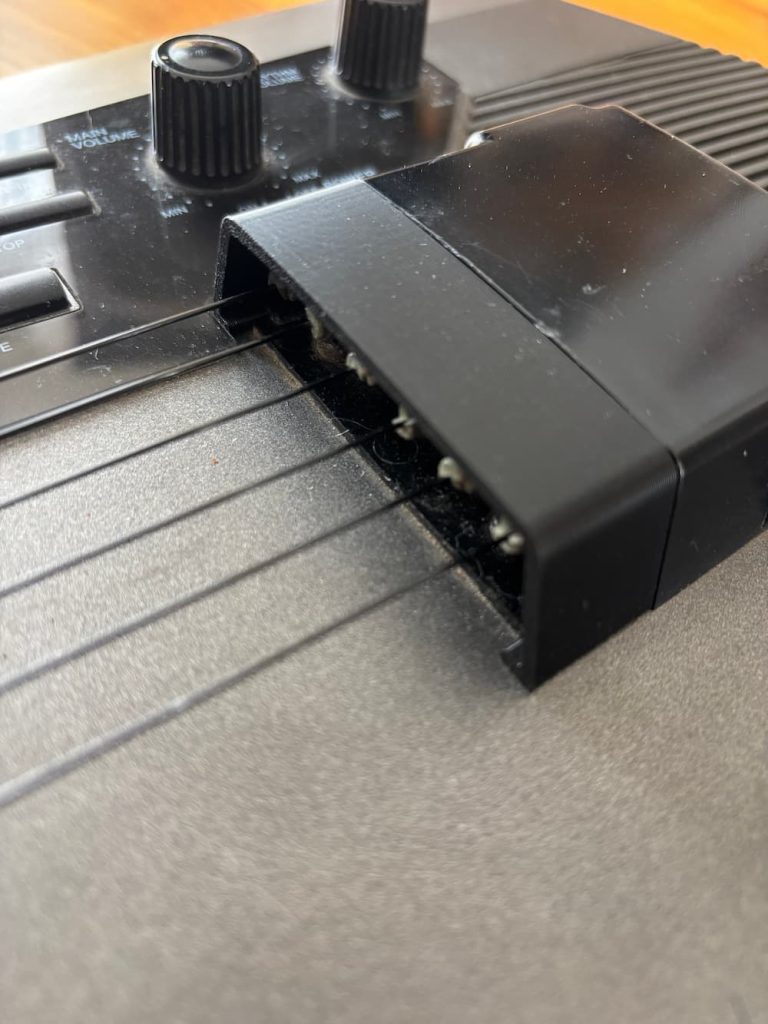
Missing string cover
Almost all of the DG-20s I’ve seen for sale are missing this piece that covers part of the bridge. As far as I can tell its purely cosmetic, but the completionism in me wanted to restore it all the same.
I didn’t have one in front of me to inspect, but eyeballing some pictures online, I modeled one up in CAD and 3D printed a replacement part. Amazingly I nailed the curvature on first try. However, it took a couple of tries to get the mounting tab fit right.
You can download my model on Printables
Of course, shortly after making it I saw another one created by @GoldELux_544357 (Printables’ search missed it for some reason). That one was more complete and includes the larger part if you’re missing it. For this and more DG-20 related parts, head to their profile.
Ready for some action (adjustment)
The next matter with the DG-20 was the action was insanely high. Like Freddie Green high. Even with the looser strings, it was not at all enjoyable to play. Turns out over a few a decades, a long narrow piece of plastic under 6-strings worth of tension is prone to warping. Who knew? Not Casio.
I puzzled over how to address this. Could I install a truss rod? I took it apart to see. No, not easily. The neck is basically a hollowed out tube with no direct access to the back of it so I’d have to take apart the fretboard to get in there which seems fragile. I guess I could chance getting laughed at by taking it to a luthier at Gryphon Strings for a “neck reset”. But the fitted bolting mechanism of the neck made this difficult without some serious hacking away at the plastic.
Some online forums suggested simply taping down the strings where the neck meets the body to lower them. This works because the pluck sensor doesn’t really use the string length to determine the pitch. The fretboard is really just individual buttons under the rubber fretboard and the strings there are really just for tactile feedback.
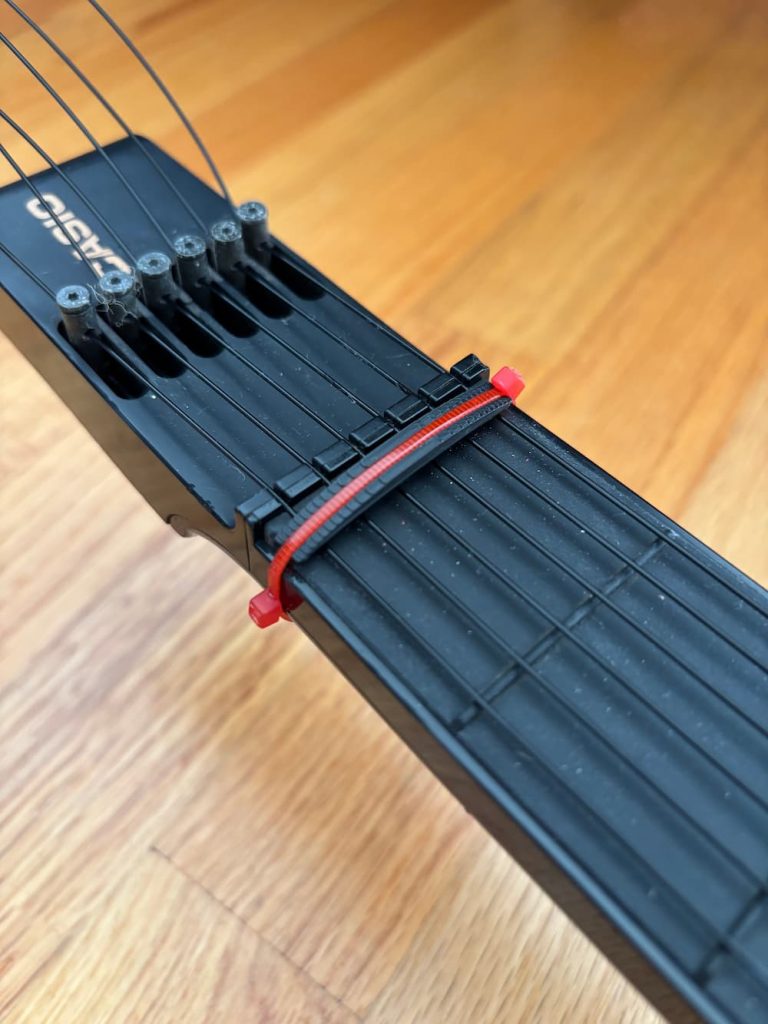
Anyway, I found taping the strings to be a little inconsistent and sloppy, but finally landed on one of those velcro cable ties. Works great and is easier to adjust. Also, the material allows the strings to slide around underneath without getting stuck. I added a couple of extra pieces in the middle to give some added pressure down on the middle strings to account for the bowed curvature of the strip when attached.
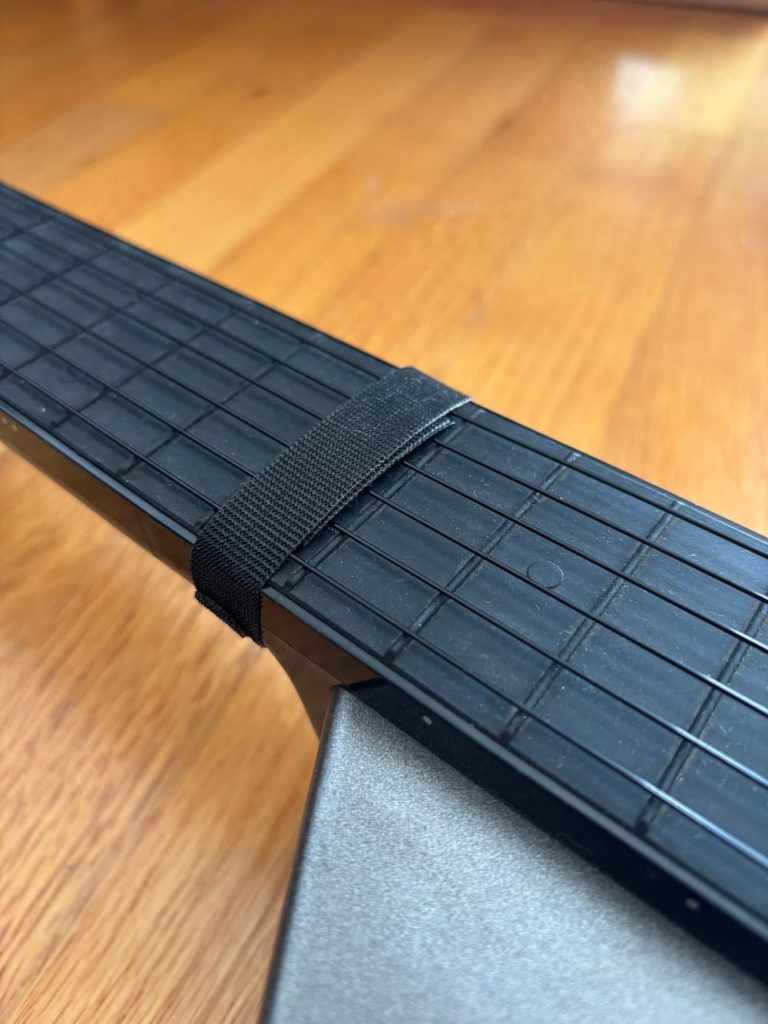
I can actually still fret the 15th-fret note by pressing on the velcro which is kinda clunky, but I don’t play up there very often.
I still found the action to be unpleasant and thought that the action at the nut was also inherently too high. While watching a video of Billy Strings absolutely ripping on one of these guitars… oh let’s just see that while we’re at it:
He seems to have a zip tie around the nut to lower it some more. I added that myself, and 3D-printed a little piece to go under the zip tie to apply even pressure.
That solved the action issue, more or less. Much more playable overall. The model is also available on Printables, and requires a couple of 2.75mm zip ties to install. You can probably rig up something similar, maybe the velcro works here too.
By the way, the Suzuki Unisynth gets around this nonsense by not having strings over the fretboard at all, and including horizontal string-like texture on the rubber fretboard itself, I think it’s superior to these floppy things. Maybe another improvement could be to somehow add this texture to the original fretboard, and forgo the strings altogether. But you’d need to figure out how to keep strings over the body for the pluck sensor.
Oh, what the hell: USB-C charging
These guitars are really no fun to play if you have to plug them in, but D-Cell batteries are heavy, expensive, and less-common in rechargeable variants. They also discharge and leak horrible acid when left in too long.
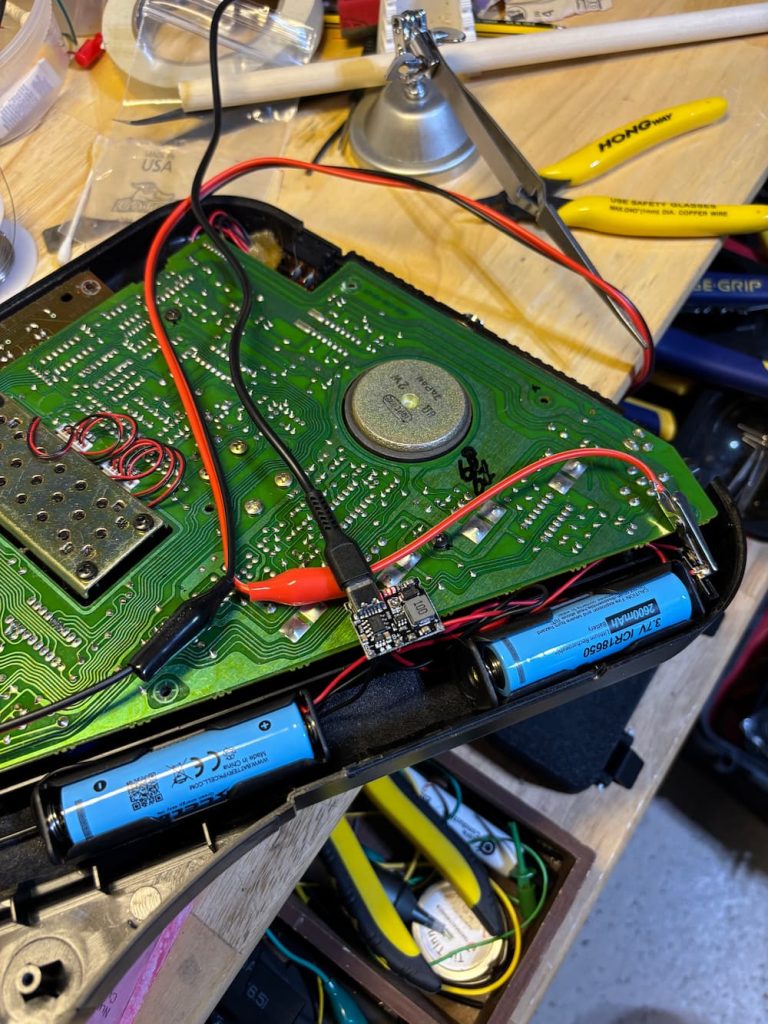
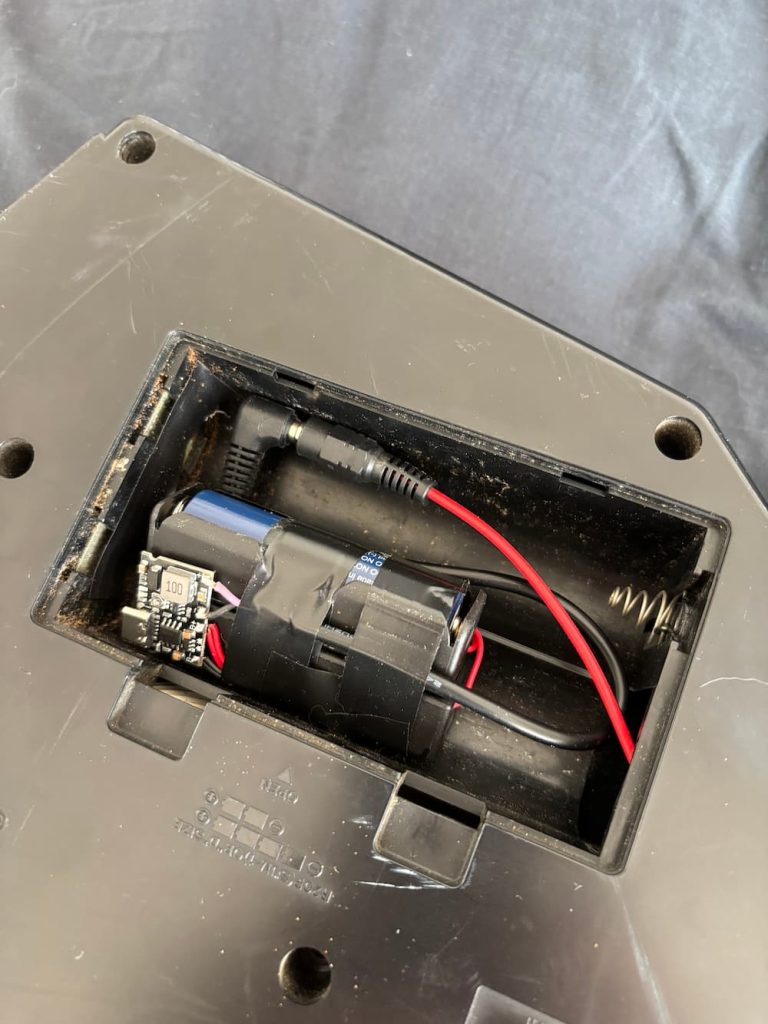
I thought I’d take advantage of modern LiPo battery tech. There was plenty of space in the battery cavity for a couple of ubiquitous 18650 LiPo cells. All I had to do was connect a charging + boost module to them and step them up to the operating voltage of 9V. I happened to have these components from another abandoned project; I have no shortage of those.
The module is based on the TP4056 chip and has a built-in buck converter to step up the battery voltage to an adjustable amount up to 28V. It’s available here very cheaply along with some handy 18650 battery housings: https://amzn.to/4xYoo9w (affiliate link). For the cells, I got these: https://amzn.to/44JW0KF
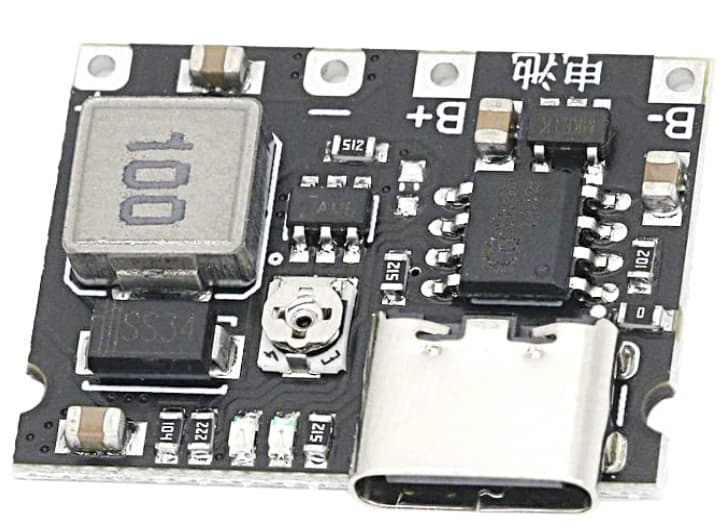
Looks intimidating, but it’s pretty simple to wire up. While it’s possible to do this with one 18650 cell, I’m wiring the two cells in parallel for extra capacity, so both the red wires of the battery housings go into B+, and the black ones go to B-.
Once you have the batteries attached, charge them up via USB. The LED will start red, and turn blue once they are done. This can take a few hours. Then you can wrap the batteries together into a pack with electrical tape or hot glue. Note that you shoud NOT COVER THE CHARGE BOARD WITH TAPE. It gets hot needs ventilation for cooling.
While it’s charging, let’s adjust the voltage. Attach a multimeter to the unsoldered V- and V+ terminals. This is our output voltage. Measure the voltage coming out of the board and adjust the small screw in the middle of the board counter-clockwise until it reads about 9V. You may have to turn it over 10 times.
For attaching the board’s remaining V+ and V- output to the device, I opted to make the battery detachable, so I wired a male barrel connector. Red cables always go to + and black to -. I soldered the female connector to the negative and positive terminals of the battery compartment, which were also color-coded.
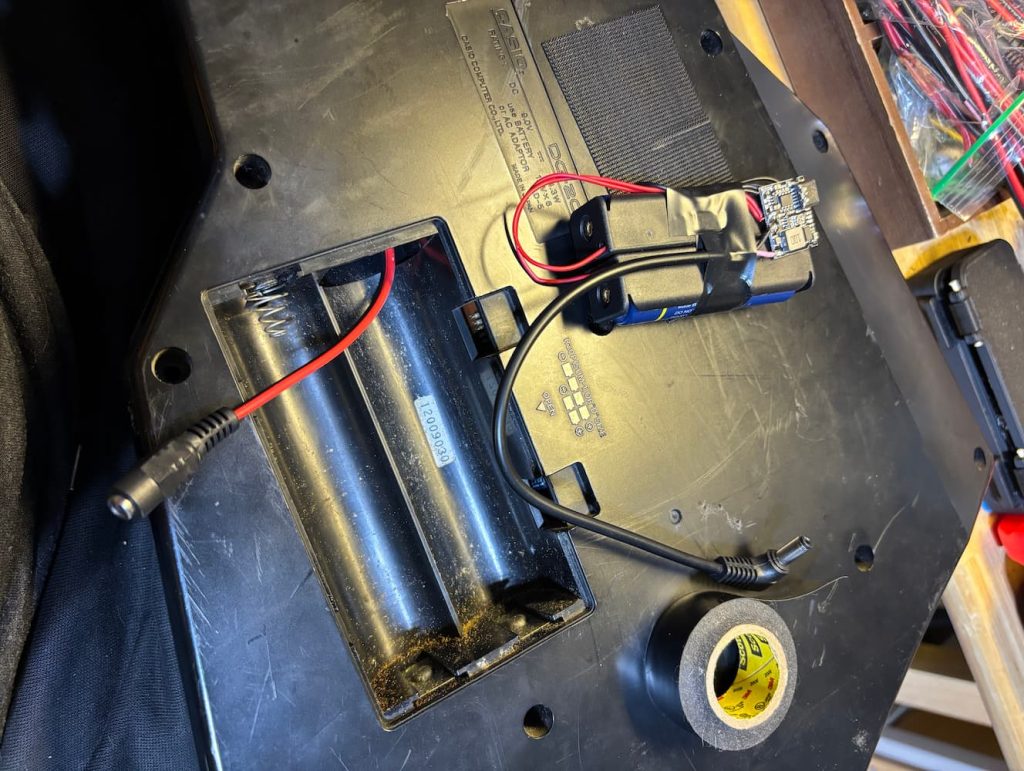
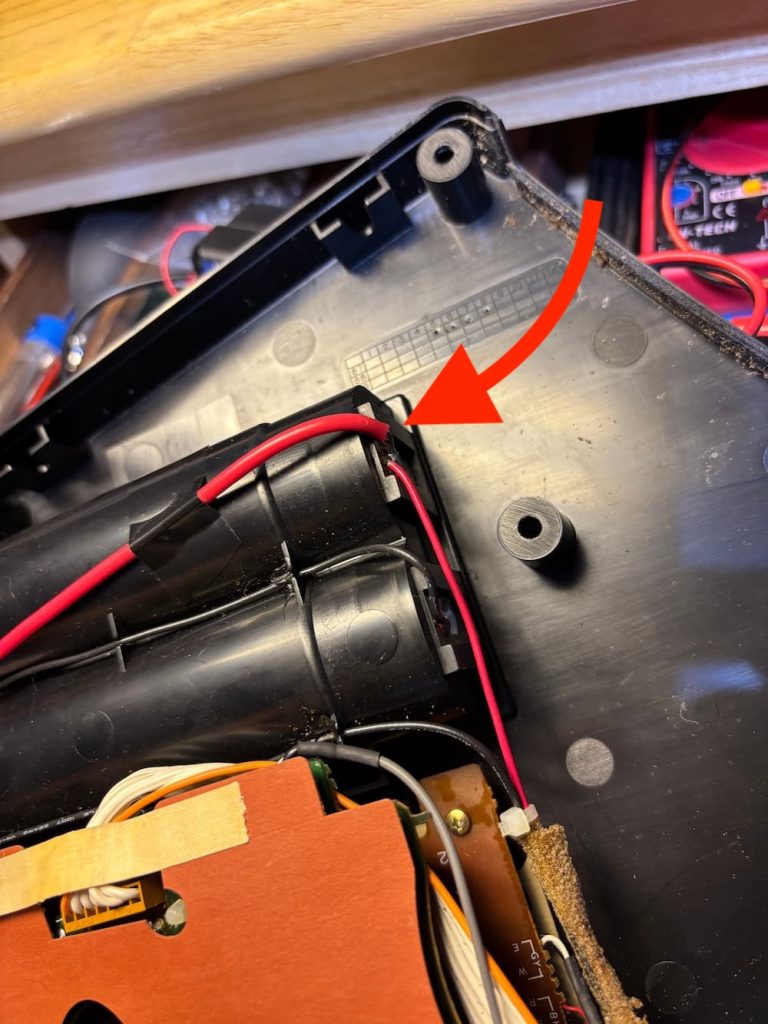
With the wiring done, I put the whole thing back together, and the battery just fits inside. I shielded the DG-20’s old battery contacts with electrical tape to prevent shorts.
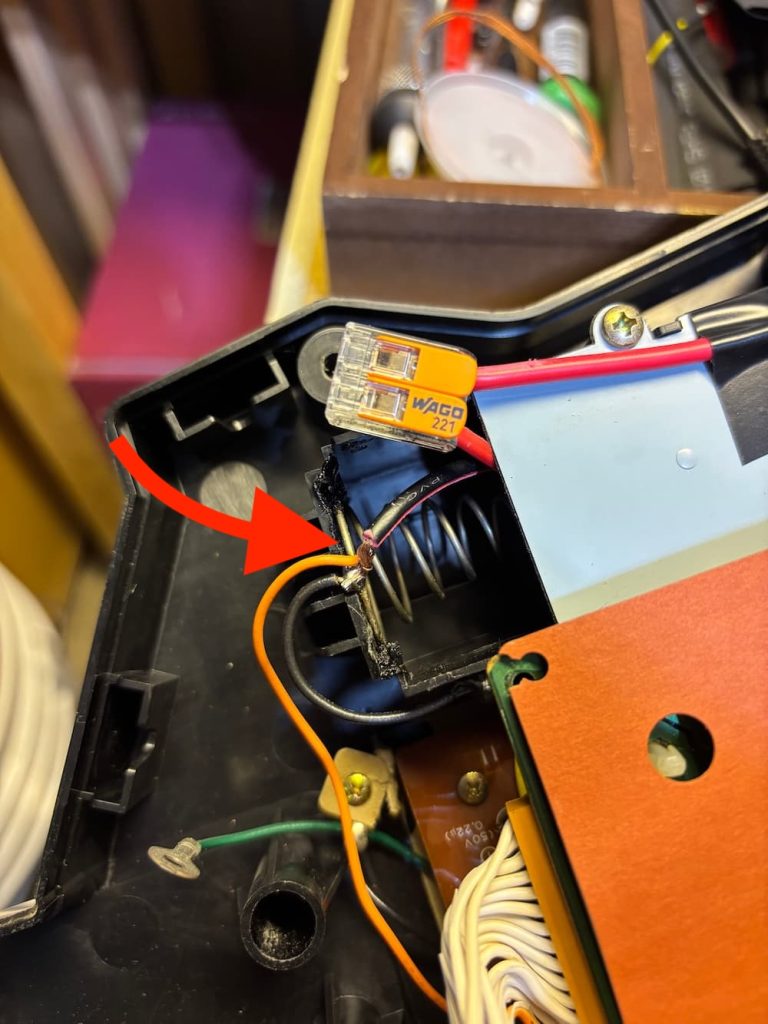
The cool thing is you can use this technique to power any kind of older battery-operated device, so I went ahead and did it to the Unisynth as well.
Not as much space in Unisynth’s C-cell sized battery compartment, so I did not bother to make the battery detachable; I just wired it directly. One hiccup is that I had to add a 10-ohm 5W current-limiting resistor in series with the battery negative to the device, since I discovered the initial current surge triggers the module’s protection circuit (if you encounter this, easy fix: plugging it into USB resets the protection). The additional resistor solved that issue.